INSTRUCTIONS
Special equipment: Oven or smoker. If you’re utilizing an oven, we recommend using Satchmo’s Pre-Smoked line of rubs. This will allow you to finish with a wood smoked flavor like using a smoker!
APPLYING THE RUB
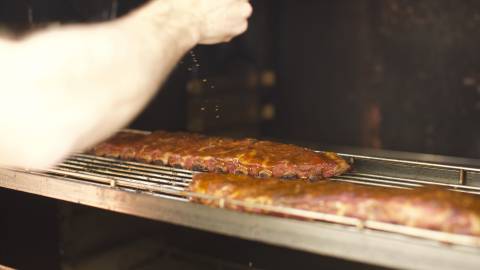
Layout rack of ribs on a clean counter or cutting board. Scoop 1⁄4 cup of rib rub and apply a light layer of rub over the surface of rack. With the palm of your hand firmly press and massage the rub into the surface of the ribs. The idea is that you are pressing and rubbing the seasoning into the top layer of the meat. Apply the remaining 1⁄4 cup of rub over the surface of the rack of ribs, ensuring that the entire surface of the ribs is covered. Set seasoned rack to side while getting oven/smoker pre-heated.
PREHEATING OVEN/SMOKER
Set oven/smoker temperature between 220°- 230°. Once your smoker has reached temp, place your choice of wood along the edge of your fuel source until you see a light rolling (blue) smoke, not to be confused with a heavy white cloud of smoke. The addition of wood is not necessarily intended to increase temperature, but instead flavor.
IF YOU LOOK’N YOU AIN’T COOK’N! - PART A
At this point, place ribs in smoker over indirect heat. Cook ribs in smoker untouched for approximately 3.5-4.5 hours at around 225°. It’s OK to take a quick peak at the ribs after the 1st hour or so but leave the smoker lid closed as much as possible during this time. During this time proceed to the ‘Let’s Mop’.
PREPARING THE MOP
Using a small stock pot or sauce pot, add soda, fruit juice* or fruit juice concentrate and vinegar into a small sauce pot. Over medium heat, bring contents to a boil, remove from heat and set aside.
*If you’re using actual fruit juice (un-concentrated) you will bring the contents to a boil and then reduce to a simmer. Let mixture simmer until the overall mixture has cooked down about 25% overall. Turn off heat and set to side.
Add the Calabrian chiles to the food processor and pulse a few times. Slowly add the blended oil; process until pureed. Transfer the mixture to the 2-quart container and stir. Cover and place in a cool dark place. Stir daily for 7 days. On the seventh day, pour the mixture through cheesecloth and discard the pulp.
IF YOU LOOK’N YOU AIN’T COOK’N! - PART B
The goal during this cooking time, is for the rub to form a bark on the rack of ribs. Creating a bark on the ribs is a process that will happen slowly throughout the cooking process.
At the 3.5-hour mark open the pit and look at the ribs. You should notice much of the rub has begun to cook into the rack (AKA the bark). There will likely still be some spots where the sugar is still visible (that’s normal). With a medium pair of tongs pick up the rack by grabbing only about 4 ribs deep. The idea here is that the rack is meant to bend when lifted. Carefully look at where the rack bends. Is the meat beginning to separate? If so, perfect!... It’s time to start mopping the ribs. If the rack is too firm (and does not show any separation) close the lid and cook for another 30-40min before checking again.
LET’S MOP!
Once you’ve determined that he rack of ribs is tender enough, it’s time to add the mop. Using a small stock pot of liquid that you combined and heated earlier, transfer 1⁄2 cup of the mop to a separate container or new/clean spray bottle*.
*If your fruit juice concentrate has any sort of pulp, you will need to use a basting brush as the pulp will clog a spray bottle.
Gently apply the mop over the rack. Pay special attention to not rinse off the rub! You will repeat this process every 15 minutes for one hour (a total of 4 times). Note; as you apply the mop, you will notice that the bark will become firmer each application, allowing you too apply the mop more generously each time. Leave the extra mop in the stock pot for later use.
LET’S EAT!
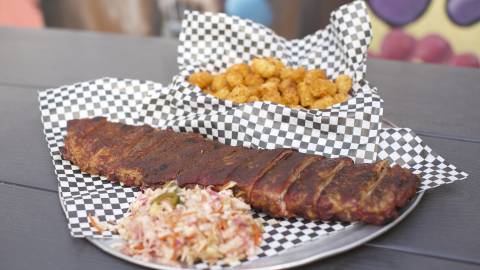
If the ribs were separating as described above (If you Look’n you ain’t Cook’n! - Part B), the ribs should be perfectly tender. Set rack of ribs on cutting board and run a knife in between each ribs. Place ribs on a platter and take a little more mop and drizzle over the finished rack of ribs... and EAT!


